Build Your Own Live Edge Coffee Table - Free Step-By-Step Plan
Posted by Mark Newton on

Build your own Live Edge, Coffee Table
Materials you’ll need:
1. Live edge slab. Any species will do. Mine was White Oak.
2. Hairpin legs.
3. Screws to attach the hairpin legs
Your hairpin legs usually come with screws but if they don’t, any black 3/4” wood screw that’ll fit the pre drilled screw holes will do just fine.
Tools needed:
2. Miter saw for the cross cuts
If you don't have a miter saw, you could use a track saw, a circular saw or a router and a straight edge. You could even use a jigsaw or a hand saw if you want.
What ever you have, we give you step by step instructions below.
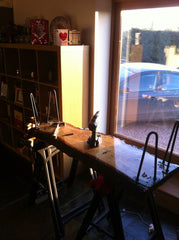
3. Saw horses (or anything else that'll enable you to hold the slab flat, at a comfortable working height)
4. Set of twist drill bits or a Vix bit
Step-By-Step Instructions:

1. First of all, you'll want to take a good close look at the slab you have...
Is it flat?
How flat is it?
If it isn't flat, after you build it, it will rock.
There are only 2 solutions to this.
Option 1 is to properly flatten the slab (see the Slab Flattening blog post HERE).
Alternatively, if you don't want to flatten the slab or you can't because you either don't have the time or the equipment.
Option 2 is to shim the legs after you build it.
Shimming the legs is pretty simple, you're just going to figure out which leg is lifting off the floor when it's built and you're going to add a wooden shim under the leg plate before attaching that leg (with screws) to the underside of the table.
Better yet, shim 2 opposing legs and the shims will be half the size so they'll be much less noticeable.
2. Here's where it's important to break out your moisture meter. Depending on where you live in the USA, the ambient humidity there will affect the amount of moisture the slab needs to be stable and not move over time.
Where I live in Southern California, a slab needs to be under 4% moisture content to convince me that it won't continue to dry out and cup on me over time.
A moisture meter is a really cheap tool you can pick up from any big box store and it'll save you from a disaster so it's a worthy purchase.
Test any existing piece of wooden furniture in your home. If it’s been there for a year or two, whatever reeding you get from it is a good guide for how dry you want your slab to be.
3. Cutting the slab to length and squaring the ends.
There are a bunch of ways to do this and it really depends of the tooling you have to hand so lets start there...
Mark out with a pencil, where you want to cut the slab to length. Due to the live edge, you won't have a straight face edge to mark a 90º end line from, so what I did was - I decided where I wanted to cut the slab to give me the desired length. i used a pencil and simply marked each end.
I measured the width of the slab at those points and I marked the center of each line (the center of the slab). Now I had the centerline of the slab which I used to draw a 90º perpendicular line from. Now you have your end cuts marked.
If you're super detail oriented like I am, you can run a tape measure at both ends of the lines you drew to check that they are the same distance apart (point to point) to verify that they are parallel to each other.
Take the slab to your miter saw. A laser helps here if you have a fancy miter saw. If not you can just sight down the cut line to line up the blade with the pencil line before you commit to the cut.
If the slab is wider than the miter saw capacity, (which it probably will be), just flip the slab over and make the cut if 2 passes. Do that on both ends and you're good to go.
Line up the track with your pencil line, hook up your saw & dust collection (if you need it) and make the cut in a couple of passes. Don't ever try to cut a 2+ inch slab in a single pass with a track saw (not a good idea).
Tip - Ideally you want to clamp the track in place because the felt grips under most track saw tracks are not reliable enough on short cuts so the track may move on you. Depending on the track you have, you usually have clamps that slide into the track underneath and clamp over the workpiece. If you can't find a way to use clamps, just take your time, set yourself up for success and make cuts carefully.
Hand saw -
This will be a workout for sure but if you take your time and let the saw do the work, it'll be ok. I'd recommend that you clamp the slab to your saw horses or it'll keep moving around on you.
A little dry lube on the blade might help ward off extra friction. Make sure the teeth are sharp before you start or it'll take twice as long.
If you have a router with a straight cutting bit long enough to get through the thickness of the slab, you can use a straight edge to guide the router and cut the end grain that way.
Option one is to lay the router in place with the bit just touching the wood. With the router unplugged, position the bit to just kiss the pencil line at one end of the cut.
Repeat at the other end and place a straight edge (or a straight piece of plywood) where the router base plate will run along it to act as a fence. Clamp the straight edge in place (read THIS POST for more ways to hold a straight edge to a workpiece without marking the workpiece).
An alternative is to make a dedicated straight line jig for your router (Read THIS POST for how to do that).
There are other tools and techniques you can use to make the end grain cross cuts but using a jigsaw, reciprocating saw (sawzall) or something like that will just leave a more jagged edge for you to clean up after the fact.
If you do end up with an end grain cut that's full of deep saw marks, One option would be to take a flat piece of hardwood and using spray clue, (not fabric spray glue, you want the mist spray not the streaming spray)...
Stick on some coarse sandpaper and go to work. This would be a good example of where to scrub carpenters pencil on the surface before you start to sand it down. the pencil line tells you when you've sanded all the high spots away.
Now you have the slab cut to length and those ends are hopefully square (no biggie if they aren't really)
It's time to work on the live edge.
Disclaimer - When I built mine, I left the bark on... That's how I know it'll fall off over time
First of all, if the live edge has some bark left on there... I know it can be cool to leave it, but, believe me when I tell you...
It'll start to fall off at some future point and you don't want to have to keep fixing it back on so better to deal with it right now.
No finish will hold the bark on there including Polyurethane.
Start by prying larger pieces of bark away. Once you've gotten rid of most of it, a simple random orbital sander with some 80 grit paper on there will make light work of removing the rest. Try to get into any nooks and crannies and get as much of the bark as you can.
Next, you'll want to sand the live edge just the same way to would the rest of the table. You can get as artistic as you want here though. Sand it until you know it won't leave a splinter in someone's hand and sand it some more if you prefer a smooth surface. It's entirely up to you, it's your table.

Next you'll want to sand the top and underside to the same grit. depending on how rough the surface is, you might need to start with a really coarse grit first and work your way down to finer grits over time. I'd recommend sanding the table to at least 220 grit, preferably 320 grit for a really nice finish.
It's important that you sand both faces the same way or you might change the rate at which moisture in the wood can evaporate over time and the Oak might cup.

4. Finishing - Without doubt, a polyurethane finish is the gold standard for any table that might have cups etc placed on it over time. Historically, I'd always prefer an oil based polyurethane for this job. Satin is my preferred finish but that's a personal preference thing.
If you can't get oil based polyurethane where you are, any of the water based polycrylics will do the job just fine.
If you can get it in a rattle (spray) can, it'll give you a great finish but you have to be a rule follower and follow the instructions on the can to the letter or believe me, you'll screw it up. Those instructions work.
Rattle cans are expensive so option 2 is to brush on the finish. Again... Follow the instructions on the can to the letter. It'll serve you well.
Give the slab at least 3 coats. trust me, it makes a big difference.
Once you're ready to fit the legs. Flip the slab over. position the hairpin legs at each corner where you'd like them to fit. Mark where the screw holes are with a pencil.
A good tip here, if you cant see the pencil line, is to either, use a sharpie to make a dot where the screws will go or you can lay down some painters tape and mark on that.
Drill pilot holes for the screws and screw the screws in by hand first to test how much pressure it takes to drive them home.
Why?
Well, when I made mine, I used a cordless drill driver and my pilot holes were a little small. one screw snapped in the hole requiring a huge repair...
Don't be that guy.
Tip - Don't drill your pilot hole all the way through the table!"
If the pilot hole is a little tight, use a wider drill bit and try again. You're not securing a bridge over a highway here, your screws will be plenty strong enough so make it easy to drive those screws home.
Fit the legs with the screws that came with them (or take a trip to a hardware store to find some wood screws that'll work)
Flip your new coffee table over and enjoy it.
